Things have been a bit hectic around here lately-there's been a death in the family, I've been trying to make my work area more efficient and appealing, and now some B.S. with my ex-wife and her neighbor-the one that I had fooled around with a few times lately-just popped up in the last few hours. Completely out of the blue; I'd gone out of my way helping her and her family (including our son) in every way I could and as often as possible preparing for and dealing with the passing of my ex's father, and the neighbor was even a friend of hers that my she, my ex, suggested that the neighbor and I should meet to, so this was completely unexpected. Man-I can't seem to catch a break to save my life!
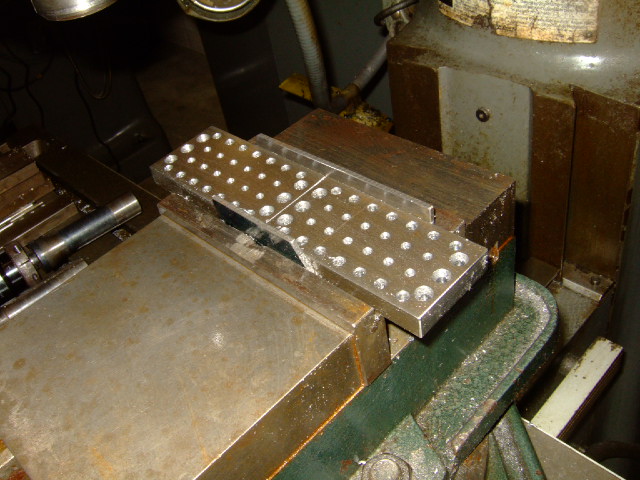
Here's a pic of two spacers (and support block) for my Taig's new tooling plate I had started on in class Friday:

Anyway, I snapped some pics while at school Friday of two of the six steel stand-offs/spacers I'm building and will grind together to very tight tolerances in all planes (-both linear and angular; along, across, and down all surfaces, measured and verified to within <0.001" or <0.0005" preferrably overall in the critical dimension of the currently estimated 0.4000" thick/tall/high, the only critical dimension, x 1.900" wide x 3.875" long-starting with 1/2" thick x 2" wide HRS flat bar-then mic'ed at frequent, close points and checked with a DTI mounted to a 24" vernier height gage on a surface plate-for parallelism in the thickness to the strictest tolerances and non-critical dimensions to more forgiving tolerances, since these will serve but only one purpose-) to have a matched set in thickness so that the installation of the matrix/tooling plate I've ordered from High-Tech Systems, LLC will be as parallel to the table of my Taig as possible.
I've also purchased another Starrett #25-511, a new 0.0001" graduated, 0-5-0 dial reading, 0.200" travel dial indicator for use in the spindle tram/square gage I'm building with the aid of the CNC equipment in my 3D programming class at school. Through my research online, I've found what I believe the perfect method to coarsely align and precisely calibrate both indicators to the shank (and the shank will be parallel and concentric to the tight sliding-fit of the bores for each indicator to within 0.0003" each of the 3.000" +/- 0.0003" center indicator bores and within 0.0006" each to the 6.000" +/- 0.0006" center indicator bores because all critical features and reference points will be machined in a single operation and program of one CNC machining center while the stepped and press-fit shank will be completely machined in a single operation in the Okuma CNC turning center, while all non-critical and 3-dimensional features on the body/indicator holder part of the gage in subsequent operations on the same machines, since the workpiece will have to be manually rotated and aligned twice after the initial machining of the bores and contouring operation for the design I've drawn up) on this gage, and will use a single, rigid reference point of constant position and height to calibrate it on a Bridgeport 2J-Series vertical knee mill that I've trammed myself to within 0.0001" with one of the #25-511 indicators. I'm pretty sure I have both of these essential items for my planned Taig mods figured out, and will even re-grind the magnetic chuck on the surface grinder before building the tooling plate spacers and ensure I have a steep starting chamfer and a deep, consistently sized bore and shaft diameters-properly matched for the press-fit, as well as consistent bores to checked and verified shaft diameters of each individual indicator. Using the CNC machines should allow for the tight tolerances to be held, but because this will be a class project I'll have the option of building more than one piece if dimension adjustments need to be made in the software due to tool wear or other factors influencing the final dimensions of the critical operations, so I'll make sure to use the proper methods-the best available to me at school-to measure and check final dimensions so that I can rely on the gage I'm building myself and should be able to trust that it's held to tighter tolerances and will provide more accurate readings as compared to any commercially-available spindle tram/square gage on the market that's within my current budget. Many venues of assistance are also available to me to help ensure that these parts turn out to tight tolerances too, so I'm pretty confident that I can make a precise, accurate, reliable, and repeatable gage with the individuals, information, equipment, tools, and accessories currently available to me.
More pics of the tooling plate's spacers/supports:
The three pics above show two views of two spacers I had started on and another of the remaining four blanks (one of them is the 1/2" x 1" x 4" long piece-it will be used in the center of the tooling plate) and the various tools used, which I'll still need to bring in one of my counterbores for a #10 SHCS and use one at school for a 1/4" SHCS on the lower side of the 1/4-20 threaded holes to fit a SHCS in one of them from the bottom if a jig or fixture is to be set up for a long period of time around the periphery of the plate and would require more support than 10-32 screws or studs or used for other reasons. The pics above were taken in ambient lighting with decent camera settings-here's a few of the same with the camera's flash:
Not much difference that I can really tell, but I wanted to show both versions.
Here's some pics of the two Starrett #25-511 indicators and the American-made #733 0-1" 0.00005" resolution and 0.0001" accuracy Starrett micrometer I figured I'd be needing for some of the upcoming mods requiring tighter tolerances than I can measure with my current Starrett mics:
The Starrett #733XFL (maybe-the good X7XX or 73X series mic with output) mic. I bought it slightly used and they included the wrong batteries (the negative terminal is too large on the Energizer batteries), but after making a 2032 3V button-cell battery work, it tested fine and works like new.
Yes, one is newer than the other, but the method of alignment I'm using doesn't actually even require identical indicators, but at least the same make and very similar model of nearly identical construction should be used for the most accuracy. I chose to use 0.0001" graduated Starrett indicators for the possiblility of superior accuracy provided the construction of the gage is within the necessary tolerances.
Ok, wait until you see my next post: A COMPLETELY REARRANGED, ORGANIZED, CLEAN, AND EFFICIENT WORK SPACE FOR ALL MY MACHINE TOOLS, HAND TOOLS, AND ACCESSORIES! Well, almost-but it's one helluva start! I have SO much more space and room, but there's still plenty of work to be done. I hope to have it finished within the next couple days and displayed here for all to see. I'm pretty proud of it-can you tell?
Until then...


